Showing posts with label how-to. Show all posts

Friday, 4 July 2014

Light Box Display Sign

Over the last couple weeks we have been captured by the laser cutting bug. The precision and intricacy that modern laser cutters and engravers can achieved is incredible. Having had a couple wood pieces cut for us for some experimental work, we got to creating a new light up sign for our booth and outdoor display. Since we were treading in new waters by creating this sign, we figured we'd make another 'how to' post for anyone else considering creating their own light up display. Here is how we made ours.

Materials List
1- 24in x 24in Sureply board
1 - 1x2x96in (8ft long) lumber
20 - 1-3/4in screws
2 - 24in LED light strips (we used these)
2 - AA battery packs (we used these)
1 - electrical switch (like this)
1- 24 x 12in piece of aluminum foil - can use multiple smaller pieces but enough to cover the 24x12in surface area
wood glue
soldering iron with flux
coloured tissue paper

We first cut the sureply into two - 24x12in pieces - one panel will be the front, the second will be the back of the completed light box. We then created a design with the same dimensions (24x12) and had it laser cut into one of the wood panels. The nice thing about using sureply is it's really sturdy and has a wonderfully smooth finished side which can either be used for a wood finished look, or can be easily painted later on.

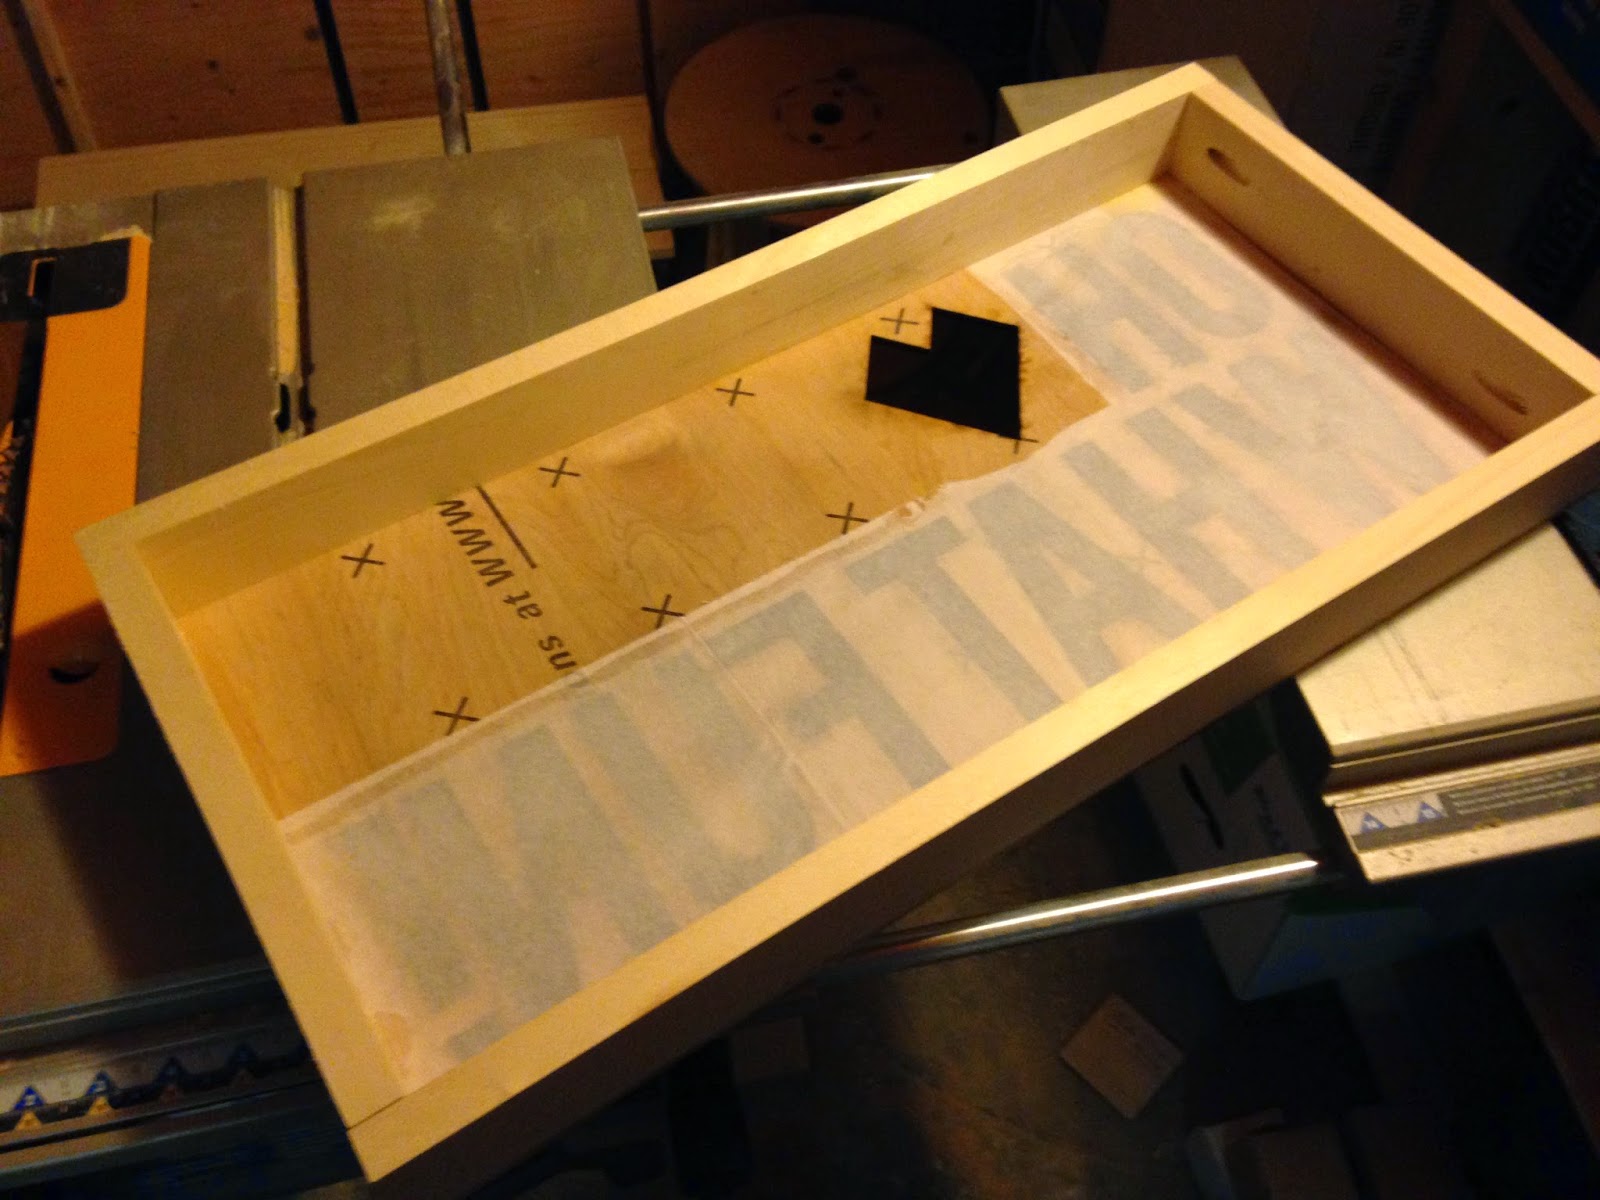
Now add your coloured tissue paper to the back of the laser cut front panel. Using the wood glue, brush out a light outline around the design and adhere the tissue paper to back. The tissue paper does not have to be cut precisely, but it shouldn't overlap anywhere visible on the front side.

Wood glue used to adhere the white tissue paper to the lettering portion on the back of the front panel
View from the front once the white tissue paper was glued on the backside of the front panel
Once you have all the tissue paper glued in, create the box which will house the lights. For this, we cut down the 1x2x96 to two 1x2x12in and two 1x2x10.5in segments. Using these pieces, create a box around the back of the front panel.
Cutting down the 8ft 1x2

The two 1x2x12in pieces cut

The box frame adhered to the back of the front panel.
Screw the sides of the box frame together. We used a Kreg jig to create pocket holes so the screws would not be visible from the exterior of the box (you can see them in the previous photo on the short 1x2x10.5in  side piece). Use the wood glue and clamps to adhere the box frame to the back of the front panel. If you plan to paint the front panel, you can use finishing nails on the front of the front panel to further reinforce the box frame to the front panel.

While the glue is setting, glue the aluminum foil to the other 24x12in sureply panel - your back panel. For best results make sure the shiny side of the aluminum foil is face outwards.

Aluminum foil, shiny side out, glued to the back panel
Now for a bit of the complicated stuff - wiring the lights. We used the ones from Walmart since we don't know a whole lot about wiring LED lights ourselves. The nice thing about these ones is that the package already comes prewired with a switch and battery pack. However the switch does not stay one automatically and the battery pack consists of a small 9volt pack. This is insufficient for longer duration of constant use.We followed the same wiring pattern from the package, but replaced the battery wiring going to the 9volt pack with the two AA battery packs and soldered together in serial. We also replaced the package light switch with a manual flip switch. Again, we followed the wiring pattern and soldered in our new switch in place.  The LED light strip also has an adhesive back, which makes mounting the lights super simple. With the wiring complete, add the lights to the bottom and top of your light box, with the lights facing the back panel.
LED strip lights mounted

we hot glued the excess wires to the back of the front panel

The soldered wires, battery packs and switch for the lights 
Our switch box with the battery packs mounted
We built a small switch box to mount the batteries to. This isn't necessary. You could mount the battery packs to the inside of the box, but we wanted easy access to change batteries as needed. Once you have all the lights mounted, and wires soldered, check to see if they all work. Now, place the back panel on, enclosing the light box using the 1-3/4in screws. Pre drill the holes, as the screws may cause your box frame to split.
Finished product
Finished product with lights on.
You can probably see our new sign in action at the next craft market. If you have any questions about how we made our custom light up sign feel free to contact us or leave a comment below. We'd also love to see pics of your own or read comment on how you would improve this build.
This was a very fun project that was a little outside of our normal operations. Hope this post is helpful to brightening up your displays as well.

Saturday, 10 May 2014

Preparing for outdoor festivals

Over the next couple months you will be able to find us at a couple amazing outdoor festivals in Saskatchewan. In preparation we have decided to make a couple upgrades to our outdoor equipment, because as any one who has sold product outdoors, exposed to all that mother nature can throw at you, it can be a pure gong show. Rain, wind, dust, snow, hail - we have seen most of it in our limited experience. One of our least favorite is the wind. It can leave you standing in a corner holding onto your tent for dear life for 8 hours straight, which is no fun for you or your customers. The worst we've seen was when one of two double tents left the ground and flew over twenty feet to land on cars in an adjacent parking lot. (This was on a record-breaking wind day, so thankfully not common!) We have used cinder blocks - great but tend to scratch things during travel to shows; water jugs - easily break rendering them completely useless; and sand bags - great for weight, but if they get wet it'll leave a murky mess in your transport vehicle and potentially your display furnishings. So this year we decided to try a new approach that seems to be well used amongst veteran outdoor festival carnies. The PVC cement pillars. And we thought we'd share how we made ours for any other people willing to take there products to the great outdoors this summer and fall. 

Materials list
1 - 10ft white PVC pipe with a 4" (100mm) diameter.
8 - 4" diameter  PVC end caps
4 - 8" x 1/2" eye bolts
4 - 1/2" hex nuts (if your eye bolts already come with them)
4 - 1/2" washers
2 - bags of 80lbs Quikrete Concrete mix - can also use 66lbs if the 80lbs bags are not available, just won't be as heavy once the pillars are made
1- clean 3 gallon pail
PVC glue
Cement trowel for mixing cement

First you will need to cut your 10ft PVC pipe into four 30" sections (2.5 ft). These four PVC tubes will be your pillars. Next, line 4 of your end caps with PVC glue.

Attached these endcaps to one end of your 30" PVC pipes.


With the other 4 end caps, mark the approximate center using a pencil and drill a 1/2" hole. This is where the eye bolts will go through.


Insert your 4 - 8" x 1/2" eye bolts through these end caps and attach the 1/2" washer and hex bolts to the bottom of the eye bolts approximately 1" from the bottom.


In a clean pail, or wheelbarrow if you have one on hand, mix the concrete according to instructions on the bag. We found it was easier to mix small batches of the cement in the pail by hand using the trowel. You will use approximately half a bag of cement mix per pillar.  Once you have the right consistency for your cement, use the trowel to scoop the cement into each of your PVC pillars, filling as close to the top as possible. Don't forget to shake the pillar as you fill to compact the cement and release any air pockets.


Coat your end caps with the eye bolts with PVC glue and attach to the top of each cement filled pillar. Make sure to press the hex bolt and washer into the cement so it is completely covered and firmly press the endcaps onto the PVC tube. Leave the pillars standing upright over night to cure.


If you use the 80lbs mix, each pillar will weight approximately 40lbs, while with the 66lbs mix they will be about 33lbs. These should be heavy enough to hold down the fort for your outdoor festivities. Make a second batch for super holding powers. Not only are these robust, easy to carry and weather proof, you can decorate them in fun designs.